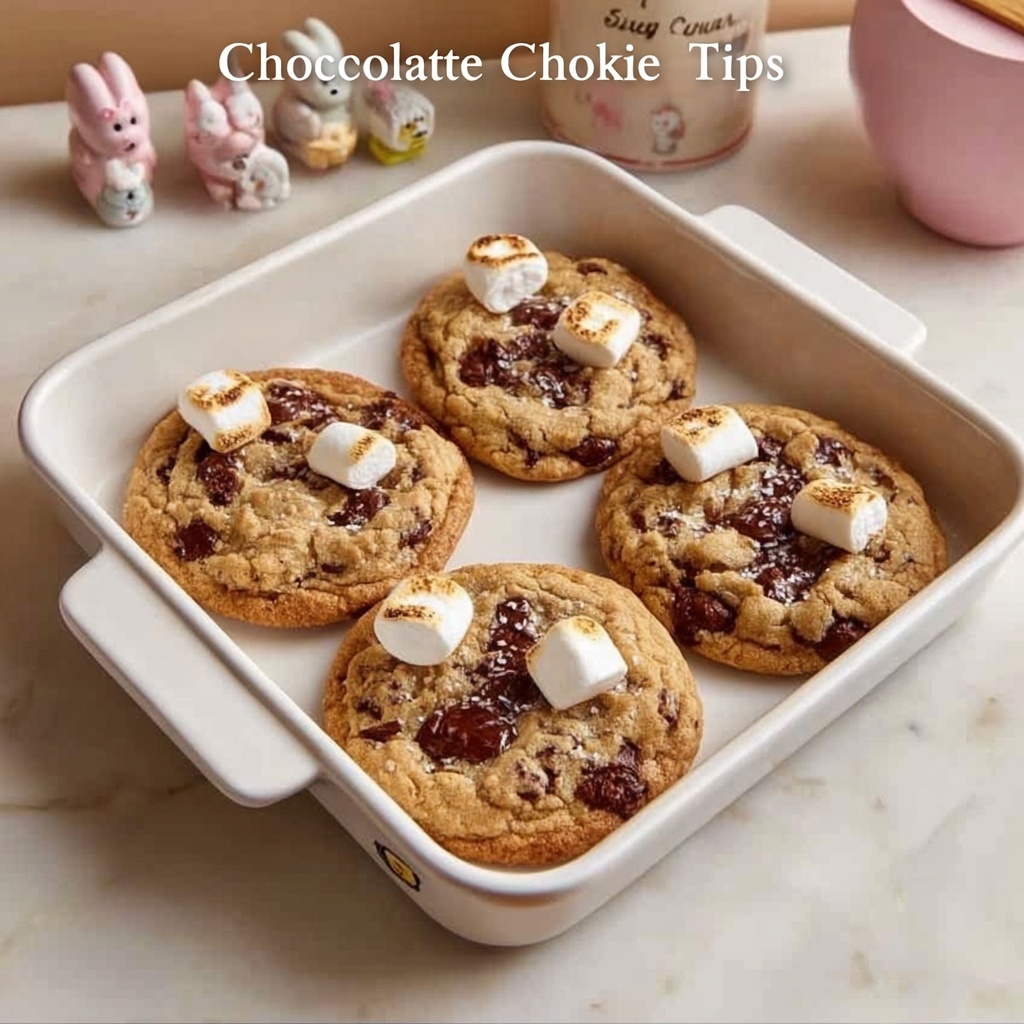
There’s something undeniably charming and downright delightful about the Chocolate Chip Bear Cookies Recipe. These adorable cookies don’t just taste amazing with their perfectly soft, buttery dough studded with melty chocolate chips, but they also bring a smile just by looking at them! If you’re craving a sweet treat that’s as fun to make as it is to eat, these bear-shaped delights will quickly become a beloved favorite in your kitchen. Whether you’re baking for kids, friends, or just yourself, this recipe combines classic flavors with a touch of whimsical creativity.
Ingredients You’ll Need
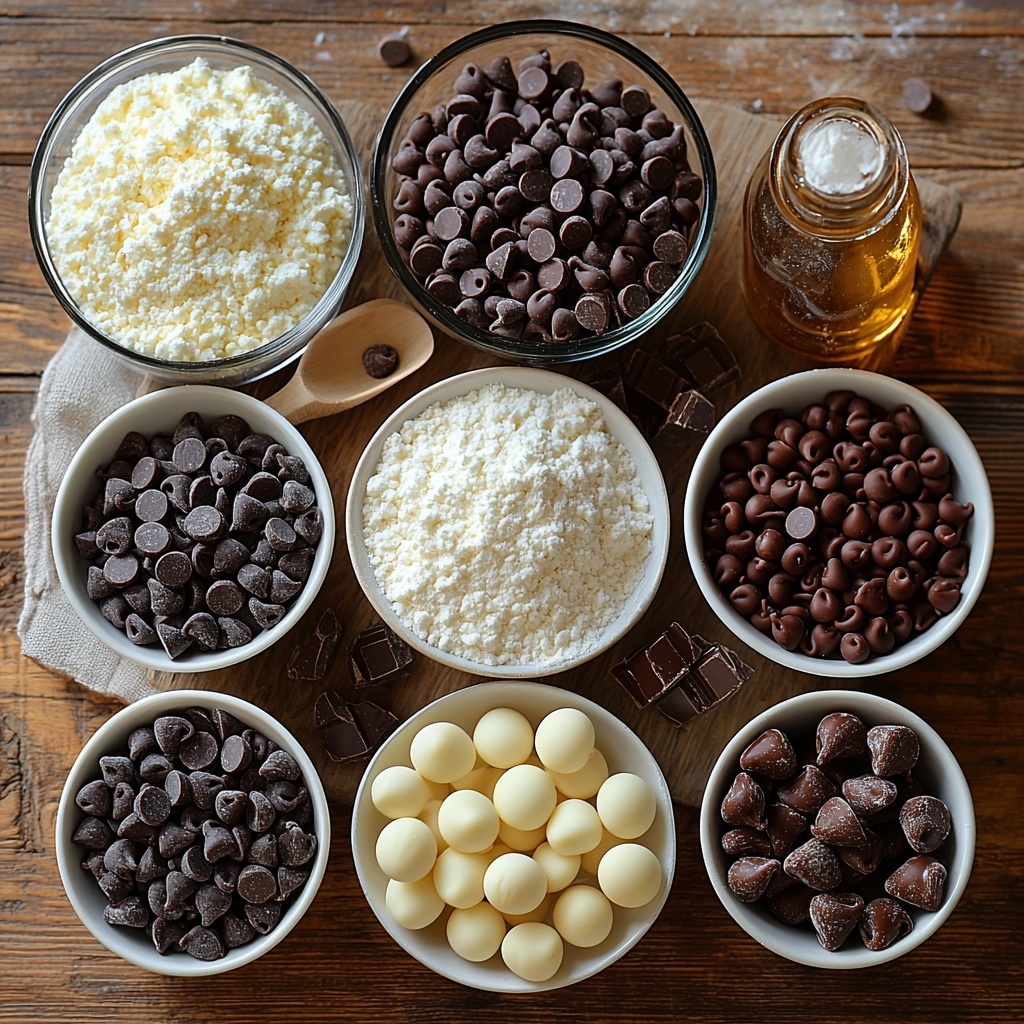
The magic behind these charming bears is all in the simple yet essential ingredients that craft their buttery, tender texture and rich chocolatey goodness. Each component plays a key role in making these cookies taste irresistibly homemade.
- Unsalted butter: 1 cup (227g) softened for that creamy, rich base and perfect cookie consistency.
- Granulated sugar: 3/4 cup (150g) to add sweetness and help create slight crisp edges.
- Light brown sugar: 1/2 cup (100g) packed for moisture and a delicious caramel depth.
- Eggs: 2 large, binding all ingredients while adding tenderness and structure.
- Vanilla extract: 2 teaspoons to infuse warm, aromatic flavor.
- All-purpose flour: 3 cups (375g) for that hearty, hold-together dough that shapes well.
- Baking soda: 1 teaspoon to lift the cookies just enough for softness.
- Salt: 1/2 teaspoon balances the sweetness and enhances all flavors.
- Chocolate chips (standard size): For belly buttons and ears, adding texture and charm.
- Mini chocolate chips or melted chocolate: Perfect for crafting eyes and mouth with fine detail.
- Chocolate-covered candies or chocolate drops: Delightful little noses giving each bear personality.
How to Make Chocolate Chip Bear Cookies Recipe
Step 1: Cream Butter and Sugars
Start by beating the softened unsalted butter together with both the granulated and light brown sugars until you get a pale, fluffy mixture. This fluffy base is crucial for achieving that light, melt-in-your-mouth texture we all adore. Use a hand or stand mixer on medium speed and take about 2 to 3 minutes getting it just right.
Step 2: Add Eggs and Vanilla
Next, crack in the eggs one at a time, making sure each is fully blended before adding the next. This slow incorporation ensures a smooth dough. Pour in the vanilla extract and beat everything together until the batter sings with rich, comforting aroma.
Step 3: Mix in Dry Ingredients
Whisk together the flour, baking soda, and salt separately to evenly distribute the leavening and seasoning. Then gradually add this dry mix to your wet mixture, stirring until it forms a soft, smooth dough. This step is where your cookie base really comes to life.
Step 4: Chill the Dough
Wrap the dough tightly in plastic wrap and pop it into the fridge for at least 30 minutes. This resting time chills the dough, making it firmer and easier to shape. Plus, it helps your cookies keep their adorable bear form instead of spreading too thin.
Step 5: Shape Your Bears
Line a baking sheet with parchment paper to prevent sticking. Now comes the fun part: shaping your bears. Use a 2-inch oval or ball for the body, a smaller 1.5-inch ball for the head, little ovals for arms and legs, and tiny 0.5-inch balls for ears and noses. Assemble each bear directly on the tray, gently pressing pieces together. A toothpick or the back of a spoon is perfect for blending and securing parts.
Step 6: Decorate Before Baking
Press standard chocolate chips onto the belly area to act as belly buttons, place chocolate candies for noses, and arrange mini chocolate chips carefully for eyes. Add chocolate chips to the ears if you want to make them extra cute. Avoid mixing chips into your dough here; placing them individually ensures your bears get those perfect, expressive faces.
Step 7: Bake to Golden Perfection
Preheat your oven to 350°F (175°C). Bake the bears for 10 to 12 minutes until their edges turn a light golden color and the cookies feel set. Let them cool on the baking sheet for about 5 minutes before moving them to a wire rack. Once fully cooled, grab some melted chocolate and a toothpick to decorate smiles or other delightful facial expressions, adding the final touch of personality to your bear cookies.
How to Serve Chocolate Chip Bear Cookies Recipe
Garnishes
These bear cookies shine as they are, but a sprinkle of powdered sugar or a gentle drizzle of extra melted chocolate adds a touch of elegance and sweetness. You can also offer colorful sprinkles or edible glitter on the side for a playful touch, perfect if you’re serving kids or want a festive table display.
Side Dishes
Pairing these cookies with a cold glass of milk is a timeless match that never disappoints. For a more grown-up treat, serve them alongside a warm cup of coffee or rich hot cocoa. Fresh fruit slices or a small bowl of vanilla ice cream can add a refreshing contrast to the rich chocolate and buttery cookie textures.
Creative Ways to Present
If you’re bringing these to a party or gifting them, arrange your Chocolate Chip Bear Cookies Recipe on a rustic wooden tray with a gingham napkin. Wrapping a few in cute cellophane bags tied with twine or colorful ribbons creates an adorable DIY gift. For a playful setting, you could include little edible props like candy flowers or tiny pretzel sticks to turn the bears into charming cookie characters.
Make Ahead and Storage
Storing Leftovers
Keep any leftover bear cookies in an airtight container at room temperature for up to a week. This keeps them delightfully soft with just the right amount of chew. Placing parchment paper between layers is a smart move to avoid sticking or smooshing those precious little bears.
Freezing
You can freeze these cookies either before baking or after they’re baked and cooled. For unbaked dough bears, shape and place them on a tray to freeze solid, then transfer into a freezer bag for up to 3 months. For baked cookies, freeze them in airtight containers or heavy-duty freezer bags. Thaw at room temperature when you’re ready for their adorable charm and delicious flavor again.
Reheating
Give frozen or stale cookies a quick warm-up in a preheated oven at 300°F (150°C) for about 5 minutes. This revives their soft texture and melts the chocolate chips just a little, making each bite feel freshly baked and utterly irresistible.
FAQs
Can I use margarine instead of butter in the Chocolate Chip Bear Cookies Recipe?
Butter is preferred here because it provides richness and helps achieve the perfect texture. Margarine might alter the flavor and cause the cookies to spread more, but if necessary, use stick margarine with no water content for the best results.
Why do the ears and limbs sometimes fall off the cookies?
Chilling the dough before shaping helps parts hold together better. Also, gently pressing the pieces firmly and using a small dab of water or extra dough as “glue” can improve assembly before baking.
Can I make these cookies gluten-free?
Yes, you can substitute the all-purpose flour with a gluten-free flour blend that’s suitable for baking cookies. Just make sure the blend contains xanthan gum or add it separately to help with the structure and binding.
How do I prevent the chocolate chips from melting too much during baking?
Press the chocolate chips gently into the surface after shaping the bears but avoid mixing them into the dough beforehand. Also, baking at the recommended temperature and time ensures they soften without completely losing their shape.
Can I add nuts or other mix-ins to the dough?
Absolutely! Chopped nuts like walnuts or pecans add a fantastic crunch, and dried fruit can bring a sweet chewiness. Just fold them in gently during Step 3 to maintain your bear shapes.
Final Thoughts
Baking the Chocolate Chip Bear Cookies Recipe is a joyful experience that rewards you with adorable, tasty cookies perfect for any occasion. They’re great for sharing with loved ones or treating yourself to a nostalgic snack. Once you try them, these charming bears will surely become a staple in your baking repertoire!
Print
Chocolate Chip Bear Cookies Recipe
- Prep Time: 30 minutes
- Cook Time: 12 minutes
- Total Time: 42 minutes
- Yield: 16 cookies
- Category: Dessert
- Method: Baking
- Cuisine: American
Description
Whip up these adorable Chocolate Chip Bear Cookies that are as fun to make as they are to eat. Soft, buttery cookies shaped like little bears, decorated with chocolate chips and candies for charming details. Perfect for kids’ parties, holidays, or any time you want to add a cute twist to classic chocolate chip cookies.
Ingredients
Cookie Dough
- 1 cup (227g) unsalted butter, softened
- 3/4 cup (150g) granulated sugar
- 1/2 cup (100g) light brown sugar, packed
- 2 large eggs
- 2 teaspoons vanilla extract
- 3 cups (375g) all-purpose flour
- 1 teaspoon baking soda
- 1/2 teaspoon salt
Decoration
- Chocolate chips (standard size, for belly buttons and ears)
- Mini chocolate chips or melted chocolate (for eyes and mouth)
- Chocolate-covered candies or chocolate drops (for the nose)
Instructions
- Cream Butter and Sugars: In a large bowl, beat the softened butter with granulated sugar and light brown sugar until the mixture is pale and fluffy, about 2–3 minutes using a hand or stand mixer on medium speed.
- Add Eggs and Vanilla: Add eggs one at a time, mixing well after each addition. Pour in the vanilla extract and beat until fully incorporated.
- Mix in Dry Ingredients: In a separate bowl, whisk together the flour, baking soda, and salt. Gradually add the dry mixture to the wet mixture, mixing until a smooth, soft dough forms.
- Chill the Dough: Wrap the dough in plastic wrap and refrigerate for at least 30 minutes. Chilling helps firm the dough and improves shaping accuracy.
- Shape Your Bears: Line a baking sheet with parchment paper. Form the dough into shapes: use a 2-inch oval or ball for the body, a 1.5-inch ball for the head, smaller ovals for arms and legs, and tiny 0.5-inch balls for ears and nose. Assemble each bear directly on the tray, pressing the pieces gently together. Use a toothpick or the back of a spoon to help position or blend parts securely.
- Decorate Before Baking: Gently press chocolate chips into the belly for buttons, add chocolate candies for the nose, and use mini chocolate chips for eyes. Optionally, place chocolate chips in the ears for added detail. Avoid mixing chips into the dough—placing them individually gives better control over the bear’s expression.
- Bake to Golden Perfection: Preheat oven to 350°F (175°C). Bake for 10–12 minutes, or until edges are lightly golden and cookies are set. Let the cookies cool on the baking sheet for 5 minutes, then transfer to a wire rack. Once cool, use melted chocolate and a toothpick to add smiles or other facial features as desired.
Notes
- Chilling the dough is important to keep the shape of the bears intact during baking.
- Use parchment paper or a silicone baking mat to prevent sticking.
- If you want more defined facial features, add them after baking with melted chocolate using a toothpick.
- Store cookies in an airtight container at room temperature for up to 5 days.
- These cookies freeze well if you want to prepare dough ahead of time.


