
If you adore the perfect blend of rich, creamy chocolate and luscious peanut butter, you are in for a real treat with this Homemade Chocolate Peanut Butter Cups Recipe. This classic confection gets elevated by using simple pantry staples to create irresistibly smooth and indulgent cups that melt in your mouth. Whether you’re making a batch for yourself or to share with friends and family, these chocolate peanut butter cups bring the ultimate comforting, nostalgic experience with every bite.
Ingredients You’ll Need
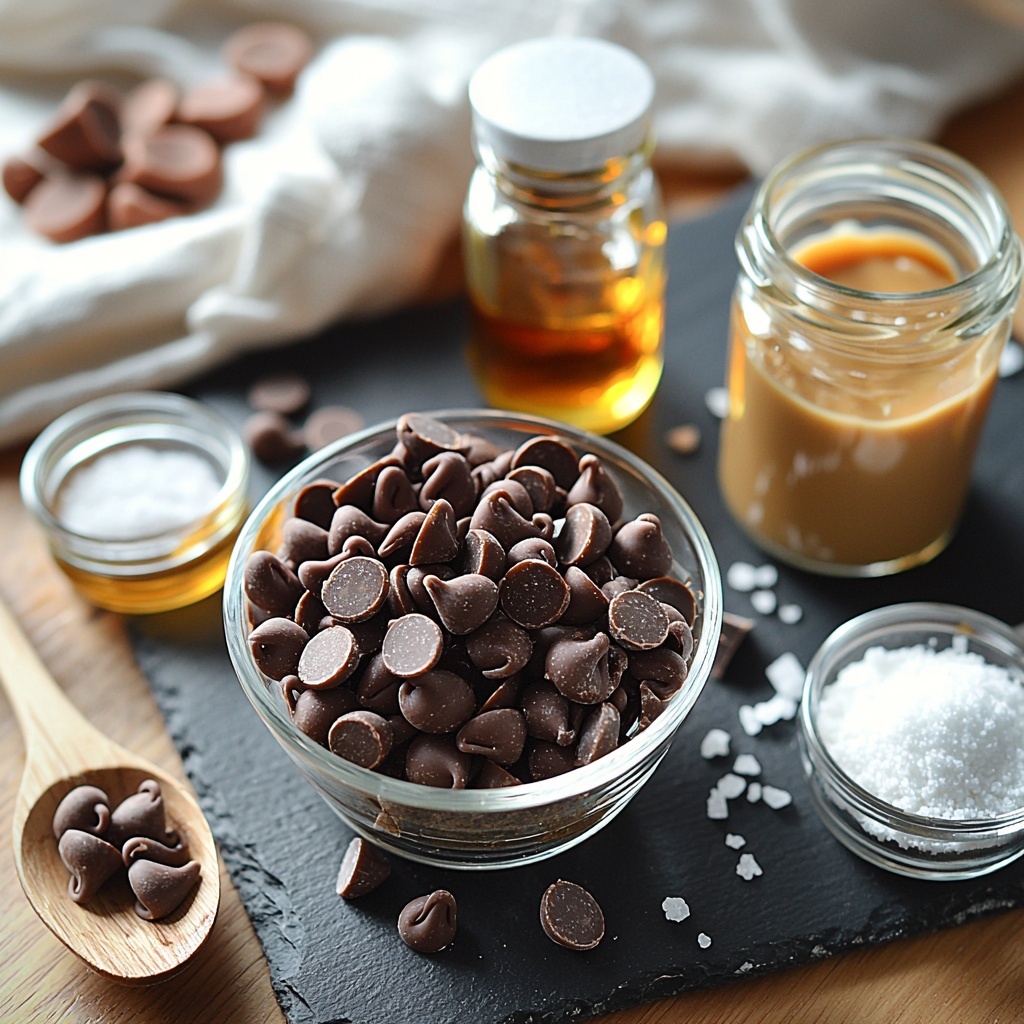
These ingredients are straightforward and easy to find, yet each one plays a crucial role in delivering the right flavor, texture, and glossy appearance of your peanut butter cups. Let’s break down the essentials.
- 16 ounces chocolate chips (divided): Using good-quality chocolate chips or chopped chocolate ensures a silky, smooth finish and that perfect snap when you bite in.
- 3 teaspoons coconut oil (divided, optional): Adds extra gloss and helps the chocolate melt evenly, giving your cups a professional shine.
- ½ cup creamy peanut butter: Shelf-stable creamy peanut butter works best for a smooth texture and rich peanut flavor.
- ¼ cup powdered sugar: Sweetens and thickens your peanut butter filling to achieve that perfect cookie dough consistency.
- ½ teaspoon vanilla extract: Enhances the flavor depth, lifting the peanut butter’s natural notes beautifully.
- ¼ teaspoon table salt: Balances sweetness and intensifies the chocolate and peanut butter flavors.
How to Make Homemade Chocolate Peanut Butter Cups Recipe
Step 1: Prepare Your Pan
Start by lining a 6-cup muffin tin with silicone or paper liners. If you want smaller-sized cups, grab 12-cup mini cupcake liners instead. This containment makes the assembly super easy and helps the cups release flawlessly after setting.
Step 2: Assemble the Chocolate Base
Place 1 cup of your chocolate chips into a heat-safe bowl and microwave in 30-second intervals, stirring between each until mostly melted but still with a few chunks. Stir continuously to melt fully using the residual heat. Add 1 teaspoon of coconut oil and mix until the chocolate becomes shiny and smooth.
Step 3: Form the Chocolate Base
Spoon about half a tablespoon of this melted chocolate into each muffin cup. Use the back of the spoon to spread it into a thin, even layer covering the bottom. Then chill the tray in your fridge or freezer for 5 minutes to set the chocolate firmly.
Step 4: Prepare Peanut Butter Filling
While the chocolate is setting, combine ½ cup of creamy peanut butter, ¼ cup powdered sugar, ½ teaspoon vanilla extract, and ¼ teaspoon salt in a medium bowl. Use a handheld mixer on medium speed until the mixture becomes smooth and well incorporated. If you opt for natural peanut butter, simply add one or two tablespoons more powdered sugar to get a thicker consistency that can be shaped.
Step 5: Shape Peanut Butter Discs
Remove the muffin tin from the fridge or freezer. Scoop about one tablespoon of the peanut butter mixture per cup. Shape each scoop into a small disc slightly smaller than the chocolate base layer. Place them gently on top of the hardened chocolate in each cup.
Step 6: Melt Remaining Chocolate
Heat the remaining 1½ cups of chocolate chips in a clean bowl using 30-second bursts in the microwave, stirring frequently until just melted with a few chunks left. Stir with residual heat until completely smooth. Stir in the remaining 2 teaspoons of coconut oil for that glossy finish.
Step 7: Cover Peanut Butter
Pour approximately 2 teaspoons of melted chocolate over each peanut butter disc. Smooth it over with the back of a spoon, making sure to cover the filling fully and allowing excess chocolate to drip down the sides. This creates the classic sealed chocolate peanut butter cup look and taste.
Step 8: Harden Peanut Butter Cups
Chill the assembled cups in the refrigerator for about an hour to firm up, or pop them in the freezer for 10 to 15 minutes if you’re short on time. Once set, they are ready for enjoying or storing.
Step 9: Store and Serve
Pop the cups out of the muffin tin and liners if you like, then store them in an airtight container in the refrigerator for up to 5 days. When ready to eat, let them sit at room temperature for 5 to 10 minutes. You’ll find the flavors blossom and the texture softens beautifully.
How to Serve Homemade Chocolate Peanut Butter Cups Recipe
Garnishes
Sprinkle a pinch of flaky sea salt on top right after pouring the final chocolate layer to add a glamorous finish and an exciting salty crunch that perfectly contrasts the sweet interior.
Side Dishes
Serve these peanut butter cups alongside a cold glass of milk or a creamy iced coffee for a perfect sweet snack break. They also pair wonderfully with fresh berries or a bowl of vanilla ice cream for a simple yet elegant dessert.
Creative Ways to Present
Wrap individual cups in colorful foil or place them in small decorative paper liners for gifting or parties. For a fun twist, drizzle contrasting white chocolate or sprinkle crushed nuts on top before chilling to elevate both aesthetics and flavor.
Make Ahead and Storage
Storing Leftovers
Your homemade chocolate peanut butter cups can be stored in an airtight container in the refrigerator for up to five days without losing their delicious texture and flavor. This makes them perfect to prepare in advance or enjoy throughout the week.
Freezing
If you want to keep them longer, freeze your peanut butter cups in a sealed container for up to two months. Be sure to separate layers with parchment paper to prevent sticking, and thaw in the fridge overnight before serving for the best experience.
Reheating
Since these cups are best enjoyed slightly chilled or at room temperature, avoid direct heating. Instead, let frozen or refrigerated cups sit out for 10 to 15 minutes so they soften gently while preserving that divine chocolate-peanut butter harmony.
FAQs
Can I use natural peanut butter in this recipe?
Yes! If you choose natural peanut butter, add a bit more powdered sugar—about 1 to 2 tablespoons—to help thicken the filling so it holds its shape well when shaped and chilled.
Is coconut oil necessary in the Homemade Chocolate Peanut Butter Cups Recipe?
You don’t have to use coconut oil, but it really helps achieve a glossy, smooth melt and firm texture in the chocolate. If you skip it, your chocolate may be a bit duller or harder to work with.
Can I use dark chocolate instead of milk chocolate?
Absolutely! Dark chocolate adds a slightly bitter contrast to the sweet peanut butter filling, making the cups richer and more sophisticated. Just choose a quality dark chocolate you enjoy eating on its own.
How long does it take for the peanut butter cups to set?
Chilling in the fridge takes about an hour for the cups to set nicely, but if you’re short on time, placing them in the freezer for 10 to 15 minutes works great as a quicker alternative.
What is the best way to remove the peanut butter cups from liners?
Let the cups fully harden, then gently peel away the liner. Silicone liners usually pop off easily, while paper liners might tear; if so, just serve with the liners on for neatness and easy handling.
Final Thoughts
Making this Homemade Chocolate Peanut Butter Cups Recipe is like wrapping a favorite childhood memory in a modern, delicious package. The balance of silky chocolate and creamy peanut butter is simply unforgettable. I highly encourage you to try making these at home—they’re so rewarding to create and even more delightful to eat, whether for a special occasion or just a sweet pick-me-up. Dive in, have fun, and enjoy every magical bite.
Print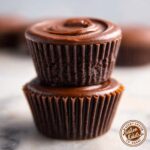
Homemade Chocolate Peanut Butter Cups Recipe
- Prep Time: 20 minutes
- Cook Time: 10 minutes
- Total Time: 1 hour 10 minutes
- Yield: 12 peanut butter cups
- Category: Dessert
- Method: No-Cook
- Cuisine: American
Description
These Homemade Chocolate Peanut Butter Cups are a delightful treat combining rich, smooth chocolate with creamy peanut butter filling. Made from scratch with easy ingredients, this recipe creates perfectly balanced, bite-sized candy cups that are ideal for satisfying your sweet tooth or gifting to loved ones.
Ingredients
Chocolate Base and Coating
- 16 ounces chocolate chips (divided; approximately 2½ cups of chocolate chips or chopped chocolate)
- 3 teaspoons coconut oil (divided, optional)
Peanut Butter Filling
- ½ cup creamy peanut butter (shelf-stable is best)
- ¼ cup powdered sugar
- ½ teaspoon vanilla extract
- ¼ teaspoon table salt
Instructions
- Prepare Pan: Line a 6-cup muffin tin with silicone liners or paper liners. Alternatively, use a 12-cup mini cupcake liners for smaller peanut butter cups for easier portioning.
- Assemble Chocolate Base: Place 1 cup of chocolate chips into a small heat-safe bowl. Microwave in 30-second intervals, stirring after each, until mostly melted but with a few chunks remaining. Stir continuously off the heat to fully melt. Add 1 teaspoon of coconut oil and stir until the chocolate is glossy and smooth.
- Form Chocolate Base: Spoon about ½ tablespoon of melted chocolate into each muffin cup, spreading it into a thin, even layer with the back of the spoon. Place the tray in the fridge or freezer for about 5 minutes to allow the chocolate base to harden.
- Prepare Peanut Butter Filling: While the chocolate is setting, combine ½ cup creamy peanut butter, ¼ cup powdered sugar, ½ teaspoon vanilla extract, and ¼ teaspoon salt in a medium bowl. Use a handheld mixer on medium speed to blend until smooth and well combined. If using natural peanut butter, add 1-2 tablespoons more powdered sugar to thicken the mixture so it can be shaped like soft cookie dough.
- Shape Peanut Butter Discs: Remove the muffin tin from the fridge or freezer. Use about 1 tablespoon of peanut butter mixture per cup and form it into small discs slightly smaller than the chocolate base. Gently place each peanut butter disc on top of the set chocolate layer in the muffin cups.
- Melt Remaining Chocolate: Place remaining 1½ cups of chocolate chips in a clean, heat-safe bowl. Microwave in 30-second intervals, stirring in between, until mostly melted with a few chunks left. Stir continuously off heat to fully melt, then add remaining 2 teaspoons of coconut oil and stir until smooth and glossy.
- Cover Peanut Butter: Pour about 2 teaspoons of melted chocolate over each peanut butter disc, smoothing with the back of a spoon and allowing excess chocolate to drip down the sides, ensuring the peanut butter is completely encased.
- Harden Peanut Butter Cups: Return the tray to the refrigerator for about an hour to let the chocolate fully harden. Alternatively, place in the freezer for 10-15 minutes to speed up the process.
- Store and Serve: Once hardened, carefully remove the peanut butter cups from the muffin tin and liners if desired. Store in an airtight container in the refrigerator for up to 5 days. For best flavor and texture, allow cups to sit at room temperature for 5-10 minutes before serving.
Notes
- Using shelf-stable peanut butter helps achieve the best consistency for shaping the filling.
- If using natural peanut butter, add additional powdered sugar to thicken the filling.
- Coconut oil is optional but helps the chocolate melt smoothly and harden with a glossy finish.
- Line the muffin tin with silicone liners for easy removal and to avoid sticking.
- Storing the cups in the refrigerator extends their shelf life but letting them warm slightly before eating improves taste and texture.
- These cups can also be stored in the freezer for longer preservation, but thaw before serving.

