
“`html
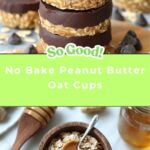
If you love the cozy, comforting flavors of peanut butter and oats combined with a touch of chocolate, then you are going to absolutely adore this No Bake Peanut Butter Oat Cups Recipe. It’s a perfect blend of creamy, chewy, and sweet that comes together effortlessly without ever turning on your oven. These little cups are the ultimate quick treat or grab-and-go snack that satisfy sweet cravings while feeling wholesome and homemade. I promise once you try making these, they’ll become one of your go-to recipes for an easy, satisfying dessert or snack.
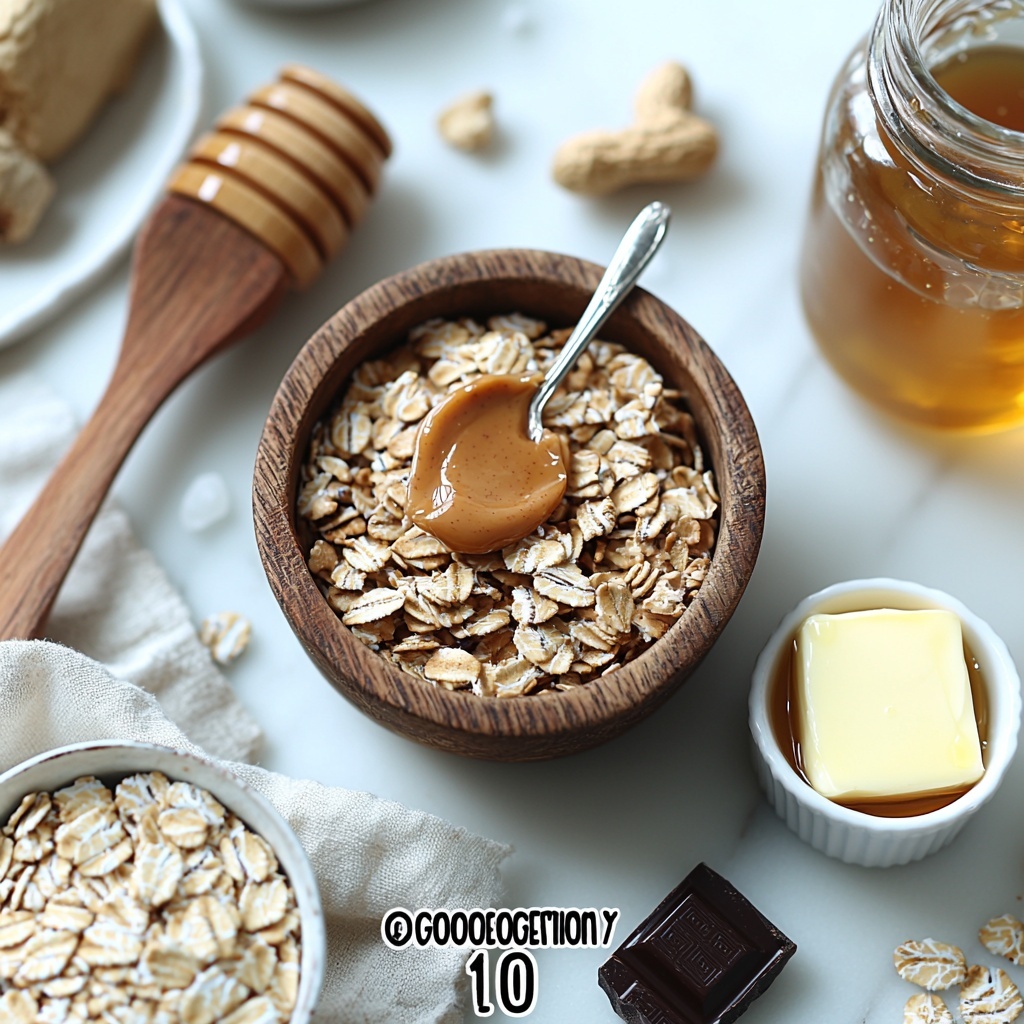
Ingredients You’ll Need
This recipe calls for a handful of simple yet essential ingredients that work beautifully in harmony to create a delightful texture and balance of flavors. Each component plays a crucial role in making your No Bake Peanut Butter Oat Cups Recipe irresistibly tasty and easy to whip up.
- 2 cups old fashioned rolled oats: The hearty base providing chewy texture and wholesome fiber.
- 1 cup creamy peanut butter: Brings creamy richness and classic nutty flavor.
- 1/2 cup honey: Natural sweetness that also acts as a binder for the oat mixture.
- 1/4 cup unsalted butter: Adds smooth, buttery richness and helps with consistency.
- 1/2 cup semi sweet chocolate chips: For that luscious chocolate topping that makes every bite a treat.
- 1 teaspoon pure vanilla extract: Adds depth and a hint of warmth to the flavor profile.
- 1/4 teaspoon salt: Balances the sweetness and enhances all the other flavors.
How to Make No Bake Peanut Butter Oat Cups Recipe
Step 1: Prepare Your Muffin Tin
Start by lining a 12-cup muffin tin with paper liners or lightly grease each cup with nonstick spray. This little step makes it so much easier to remove the cups once they’ve set, and it keeps cleanup to a minimum.
Step 2: Melt the Peanut Butter Mixture
Place the peanut butter, honey, and unsalted butter into a medium saucepan and heat over low heat. Stir continuously until everything is melted together and smooth. This mixture is the flavorful glue that holds your oat cups together.
Step 3: Add Vanilla, Salt, and Oats
Remove the saucepan from heat and stir in the vanilla extract and salt. Then add the rolled oats and mix thoroughly so that each oat is fully coated in the warm peanut butter mixture, ensuring every bite is packed with flavor.
Step 4: Fill the Muffin Cups
Evenly spoon the oat mixture into the prepared muffin tin cups. Press down firmly to compact the oats—it helps the cups hold their shape and makes them easier to enjoy without crumbling.
Step 5: Melt and Spread the Chocolate
In a microwave-safe bowl, melt the chocolate chips in 20-second intervals, stirring between each burst until smooth and glossy. Spoon the melted chocolate over each oat cup and spread it evenly. This luscious chocolate layer is what makes these cups truly indulgent.
Step 6: Chill Until Firm
Refrigerate the oat cups for at least 1 hour until the chocolate sets and the cups are firm. Once chilled, remove them from the tin and enjoy immediately or store for later.
How to Serve No Bake Peanut Butter Oat Cups Recipe
Garnishes
For an extra special touch, consider sprinkling chopped peanuts or a few mini chocolate chips on top of the chocolate before chilling. This adds a delightful texture contrast and a bit of visual flair that’s sure to impress.
Side Dishes
These oat cups pair wonderfully with a cold glass of milk or a cup of hot tea or coffee, offering a perfect balance to their chewy, sweet profile. They can also be served alongside fresh fruit for a more rounded snack or light dessert.
Creative Ways to Present
For gift-giving or special occasions, arrange the No Bake Peanut Butter Oat Cups Recipe in a decorative box with parchment paper or stack them neatly on a pretty plate with a drizzle of melted chocolate or a sprinkle of sea salt on top. They’re as stunning as they are delicious!
Make Ahead and Storage
Storing Leftovers
You can store any leftover oat cups in an airtight container in the refrigerator for up to 3-4 days. Keeping them chilled preserves their firm texture and keeps the chocolate beautifully set for easy snacking throughout the week.
Freezing
If you want to keep these treats longer, they freeze beautifully. Wrap each cup individually in plastic wrap and place them in an airtight container or freezer bag. They’ll keep well for up to 2 months. When you want to enjoy one, just thaw in the refrigerator for a few hours.
Reheating
These cups are best enjoyed chilled, so reheating isn’t usually necessary. If you prefer a softer texture, leave the cups at room temperature for 10-15 minutes before eating. Avoid microwaving to prevent melting the chocolate unevenly.
FAQs
Can I substitute maple syrup for honey in this recipe?
Yes! Maple syrup works as a great natural sweetener and binder, making this recipe refined sugar free. It may slightly change the flavor but will keep the consistency intact.
Are rolled oats necessary, or can I use quick oats?
Old fashioned rolled oats are preferred for their texture and chew, but quick oats can work in a pinch. Just note that the texture will be slightly softer and less chewy.
Can I make these cups vegan?
Absolutely! Use a plant-based butter substitute and a vegan-friendly sweetener like maple syrup. Just be sure your chocolate chips are dairy-free as well.
How do I prevent the chocolate from melting when eating these in warm weather?
Keep the cups refrigerated until right before serving and enjoy in a cooler environment to prevent the chocolate from melting too quickly.
Can I add other mix-ins to the oat mixture?
Yes! For extra texture and flavor, try stirring in chopped nuts, seeds, dried fruit, or mini chocolate chips. Just be careful not to overstuff the cups so they hold together well.
Final Thoughts
This No Bake Peanut Butter Oat Cups Recipe is truly a gem for anyone who loves tasty, fuss-free snacks that feel homemade and satisfying. Whether you need a quick dessert, a pre- or post-workout bite, or a sweet treat to keep on hand, these cups fit the bill beautifully. Trust me, once you make a batch, they’ll be disappearing fast and you’ll want to keep this recipe close for whenever cravings strike!
“`
Print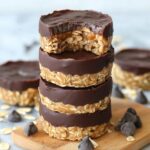
No Bake Peanut Butter Oat Cups Recipe
- Prep Time: 15 minutes
- Cook Time: 5 minutes
- Total Time: 1 hour 20 minutes
- Yield: 12 cups
- Category: Dessert
- Method: No-Bake
- Cuisine: American
- Diet: Vegetarian
Description
Delicious and easy-to-make No Bake Peanut Butter Oat Cups featuring a perfect blend of creamy peanut butter, honey, oats, and a smooth chocolate topping, offering a healthy, satisfying snack or dessert option that requires no baking.
Ingredients
Oat Cups:
- 2 cups old fashioned rolled oats
- 1 cup creamy peanut butter
- 1/2 cup honey
- 1/4 cup unsalted butter
- 1 teaspoon pure vanilla extract
- 1/4 teaspoon salt
Topping:
- 1/2 cup semi sweet chocolate chips
Instructions
- Prepare the Muffin Tin: Line a 12 cup muffin tin with paper liners or lightly grease each cup with nonstick spray to prevent sticking.
- Melt Peanut Butter Mixture: In a medium saucepan over low heat, combine the peanut butter, honey, and unsalted butter. Stir continuously until the mixture is melted and smooth, then remove from heat.
- Add Flavorings and Oats: Stir in the vanilla extract and salt until well combined. Add the rolled oats to the mixture and mix thoroughly until all oats are fully coated.
- Fill the Cups: Spoon the oat mixture evenly into the prepared muffin cups. Press down firmly in each cup to compact the mixture well.
- Melt Chocolate: Place the semi sweet chocolate chips in a microwave-safe bowl and melt in 20-second intervals, stirring between each interval until smooth and fully melted.
- Top the Cups: Spoon the melted chocolate over each oat cup, spreading evenly over the top.
- Chill: Refrigerate the muffin tin for at least 1 hour or until the oat cups are firm and set.
- Serve and Store: Remove the oat cups from the muffin tin and store them in an airtight container in the refrigerator to maintain firmness.
Notes
- For extra texture, stir in 2 tablespoons of chopped peanuts or mini chocolate chips into the oat mixture before filling the cups.
- You can substitute maple syrup for honey if you want a refined sugar-free version.
- Keep these oat cups refrigerated to maintain their firm texture and freshness.