Description
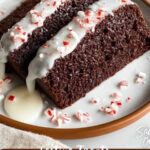
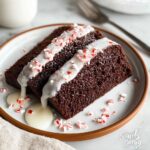
This festive Chocolate Peppermint Bread combines rich cocoa and chocolate chips with refreshing peppermint flavor, making it the perfect holiday treat. Moist and tender with a delightful peppermint glaze and candy sprinkle topping, it’s an irresistible loaf to enjoy any winter day.
Ingredients
Scale
Dry Ingredients
- 2 ½ cups all-purpose flour
- ¾ cup unsweetened cocoa powder
- 1 ½ teaspoons baking soda
- 1 teaspoon baking powder
- ½ teaspoon salt
Sugars and Wet Ingredients
- 1 cup granulated sugar
- ½ cup packed light brown sugar
- 1 cup buttermilk
- ½ cup vegetable oil
- 2 large eggs
- 2 teaspoons vanilla extract
- 1 teaspoon peppermint extract
- 1 cup boiling water
Add-ins and Toppings
- 1 cup semi-sweet chocolate chips (plus extra for topping)
- ½ cup crushed peppermint candies (plus more for topping)
Glaze
- 1 cup powdered sugar
- 2-3 tablespoons milk
- ¼ teaspoon peppermint extract
- Pinch of salt
Instructions
- Combine Dry Ingredients: In a large bowl, whisk together the flour, cocoa powder, baking soda, baking powder, and salt until evenly mixed.
- Mix Sugars: In a separate bowl, whisk the granulated sugar and light brown sugar, breaking up any clumps in the brown sugar for a smooth texture.
- Blend Wet Ingredients: In another bowl, whisk together buttermilk, vegetable oil, eggs, vanilla extract, and peppermint extract until fully combined.
- Combine Wet and Dry: Gradually add the wet ingredients to the dry ingredients, mixing on low speed with an electric mixer or by hand until just combined. Avoid overmixing to keep the bread tender.
- Add Boiling Water: Slowly pour in the boiling water while mixing on low speed; the batter will be thin but that’s expected.
- Fold in Add-ins: Gently fold in the semi-sweet chocolate chips and crushed peppermint candies, reserving some for topping if desired.
- Prepare Pan and Preheat Oven: Preheat your oven to 350°F (175°C). Grease and flour a 9×5 inch loaf pan or line it with parchment paper.
- Pour Batter and Add Toppings: Pour the batter into the prepared pan, spreading it evenly. Sprinkle the reserved chocolate chips and peppermint candies on top.
- Bake the Bread: Bake for 55-65 minutes, or until a wooden skewer inserted into the center comes out clean or with just a few moist crumbs.
- Cool the Bread: Let the bread cool in the pan for 10-15 minutes, then transfer to a wire rack to cool completely.
- Prepare the Glaze: In a small bowl, whisk together powdered sugar, milk (starting with 2 tablespoons), peppermint extract, and a pinch of salt until smooth. Add milk gradually to reach your desired glaze consistency.
- Glaze the Bread: Once the bread is completely cool, drizzle the peppermint glaze over the top evenly.
- Add Final Touches: While the glaze is still wet, sprinkle additional crushed peppermint candies or chocolate shavings on top for a festive finish.
- Set the Glaze: Allow the glaze to set completely for about 15-20 minutes before slicing and serving.
Notes
- Do not overmix the batter to maintain a light, tender crumb.
- Boiling water thins the batter, which is normal and helps create a moist bread.
- You can substitute buttermilk with milk plus 1 tablespoon lemon juice, let it sit 5 minutes before using.
- Store leftover bread in an airtight container at room temperature for up to 3 days, or refrigerate up to a week.
- Crushed peppermint candies add a lovely festive crunch; adjust amount or omit to taste.
- The glaze can be made thicker or thinner by adjusting the milk quantity.