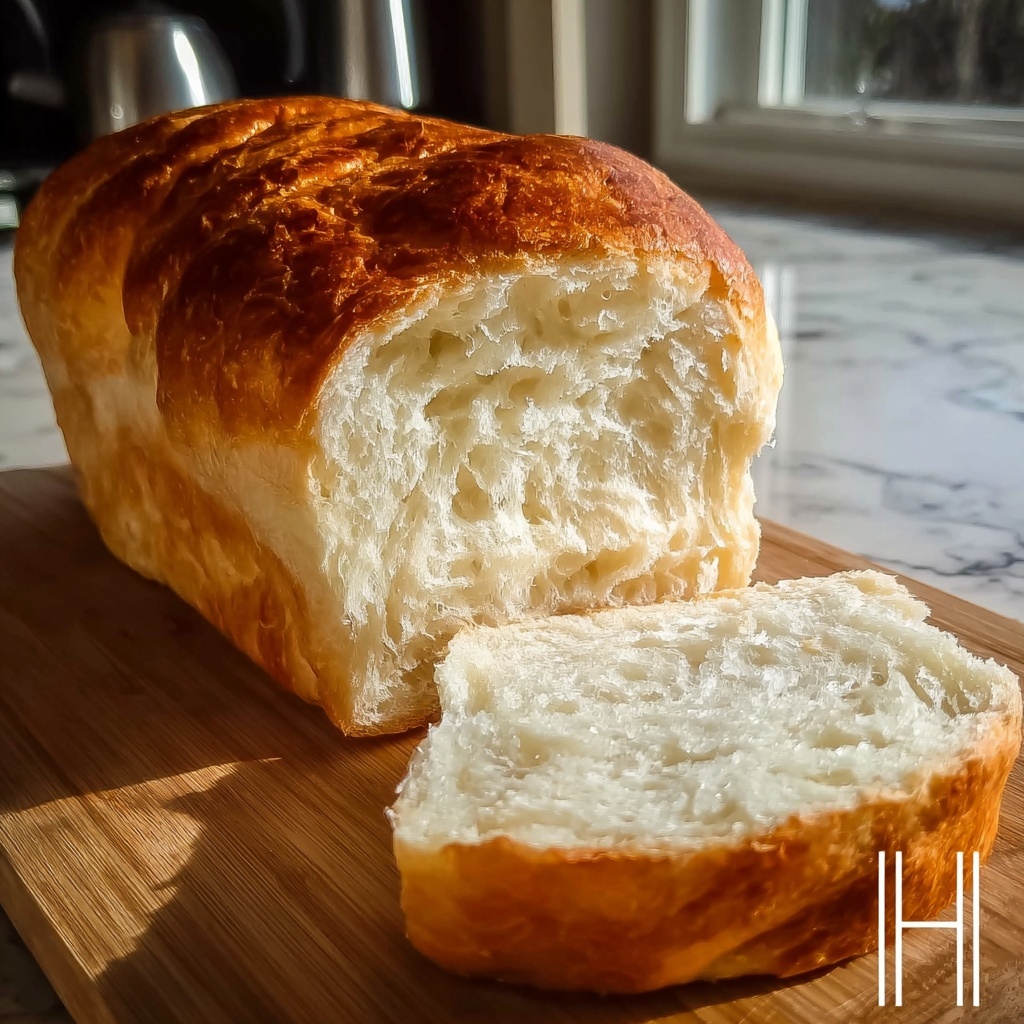
If you have ever craved the warm, soft, and utterly comforting aroma of freshly baked bread filling your kitchen, then you are in for a treat with this Easy Homemade White Bread: 7 Steps to Pure Comfort Recipe. It’s a straightforward, no-fuss approach to crafting that perfect loaf that’s golden on the outside, light and fluffy on the inside, and perfect for any meal. Nothing beats the pride and joy of slicing into bread you made yourself, each step bringing you closer to pure comfort and simple goodness.
Ingredients You’ll Need
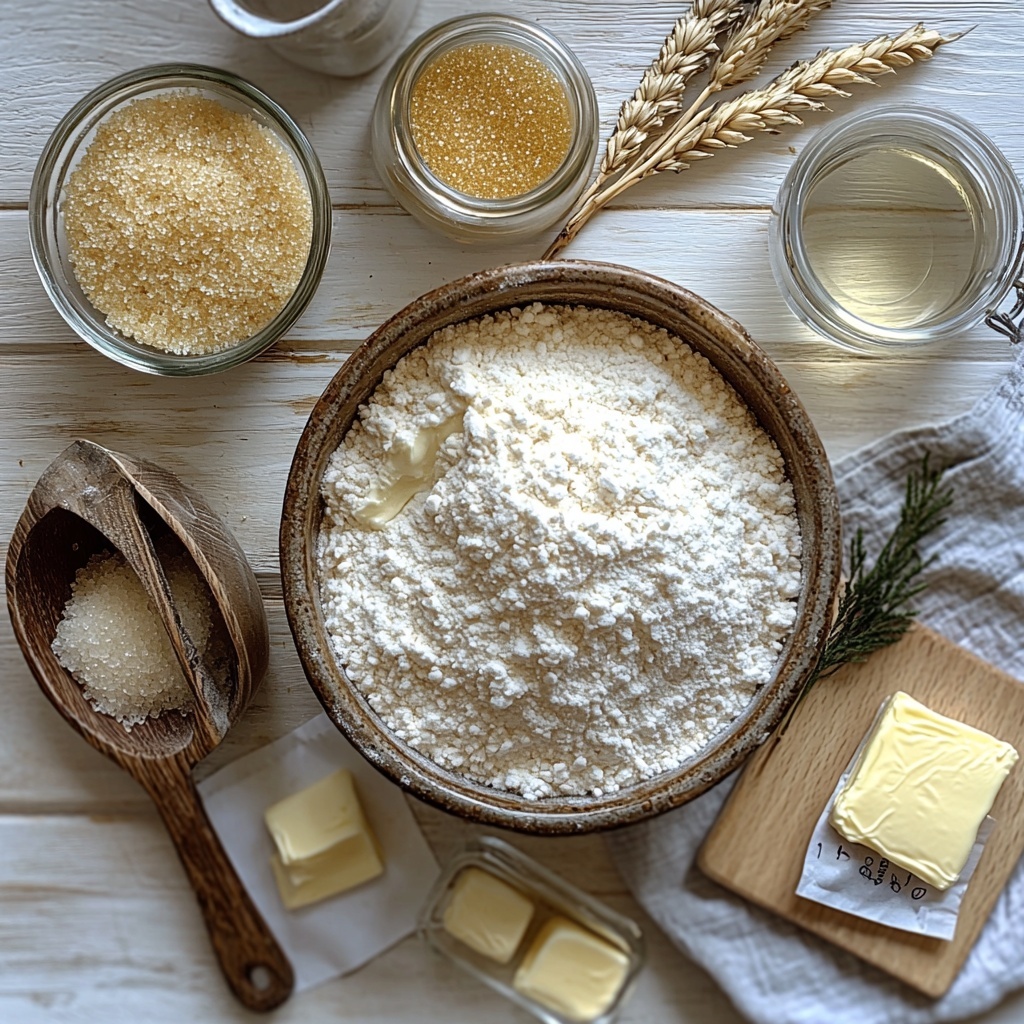
Getting started with this Easy Homemade White Bread: 7 Steps to Pure Comfort Recipe is a joy because the ingredients list is beautifully simple yet thoughtfully chosen to create bread that’s tender, flavorsome, and perfectly textured. Each component plays a vital role in bringing this homemade classic to life.
- 4 cups all-purpose flour: The foundation of your bread, providing structure and that perfect chewy crumb.
- 2 tablespoons sugar: Just enough sweetness to balance the flavors and feed the yeast for a nice rise.
- 1 tablespoon salt: Enhances flavor and controls yeast activity for a well-balanced loaf.
- 2 tablespoons unsalted butter, softened: Adds richness, tenderness, and a subtle buttery flavor.
- 1 packet (2 1/4 teaspoons) active dry yeast: The magical ingredient that makes your bread rise and bloom with airy perfection.
- 1 1/2 cups warm water (110°F): Activates the yeast and helps mix the dough into one harmonious ball of potential.
How to Make Easy Homemade White Bread: 7 Steps to Pure Comfort Recipe
Step 1: Activate Your Yeast
Begin by dissolving the yeast and sugar in the warm water. This step is crucial because it wakes up your yeast and gets the fermentation process going, which leads to that lovely airy texture. Let it sit undisturbed for 5 minutes until you see it bubble and foam—a sign it’s ready to work its magic.
Step 2: Combine the Ingredients
Next, stir in your flour, salt, and softened butter into the yeast mixture. Each ingredient blends to create a dough that’s full of promise. This mixture starts the transformation from simple pantry staples into something extraordinary.
Step 3: Knead the Dough
Now, sprinkle some flour on your work surface and knead the dough for about 10 minutes. This part is both therapeutic and essential—it develops the gluten that gives the bread its chewiness and structure. You’ll feel the dough change from sticky to smooth and elastic under your hands.
Step 4: First Rise
Place your dough in a greased bowl to prevent sticking, then cover it with a clean towel or plastic wrap. Let it sit in a warm spot until it doubles in size, about 1 hour. This rising time allows the yeast to produce those lovely air bubbles so your bread isn’t dense.
Step 5: Shape Your Loaf
Once the dough has doubled, gently punch it down to release excess air. Then shape it into a loaf and place it into a greased loaf pan. This gives your bread its classic shape and prepares it for the final rise.
Step 6: Second Rise
Cover the loaf again and let it rise for another 30 minutes until it puffs up. This final rise is key to a soft, tender loaf with an inviting crumb.
Step 7: Bake and Cool
Finally, slide your loaf into a preheated oven at 350°F and bake for 30 to 35 minutes. You’ll know it’s done when the crust turns a beautiful golden brown and the bread sounds hollow when tapped. Let your bread cool completely before slicing to enjoy the full depth of flavor and perfect texture.
How to Serve Easy Homemade White Bread: 7 Steps to Pure Comfort Recipe
Garnishes
This bread shines wonderfully on its own, but adding a light spread of butter or a drizzle of honey can elevate each slice into a special moment of indulgence. Fresh herbs or garlic butter also make for a delightful topping if you want something savory.
Side Dishes
Pair this easy homemade white bread with hearty soups, salads, or stews. Its soft crumb is ideal for dipping, mopping, or simply accompanying any comfort food meal. It also serves as a perfect base for sandwiches, from classic BLTs to gourmet grilled cheese creations.
Creative Ways to Present
Slice it thick for an inviting toast breakfast topped with smashed avocado and a poached egg, or cube it for homemade croutons that add crunch to your salads. You can even use this bread as a canvas for bruschetta or open-faced sandwiches at your next gathering.
Make Ahead and Storage
Storing Leftovers
Keep your Easy Homemade White Bread: 7 Steps to Pure Comfort Recipe fresh by storing it in an airtight container or wrapped tightly with plastic wrap at room temperature. It will stay soft and delicious for 3-4 days—perfect for enjoying throughout the week without worry.
Freezing
If you want to extend your homemade bread’s life, slice it before freezing and wrap the slices tightly in plastic and foil or a freezer-safe bag. Frozen bread retains great flavor and texture for up to 3 months. Just pull out what you need whenever the craving strikes.
Reheating
To revive your bread’s fresh-baked charm, reheat slices in a toaster or warm the entire loaf wrapped in foil in a 300°F oven for about 10 minutes. This brings back that irresistible warmth and softness like it just came out of the oven.
FAQs
Can I use bread flour instead of all-purpose flour?
You absolutely can! Bread flour has a higher protein content, which can give your loaf a chewier texture and more pronounced rise. The Easy Homemade White Bread: 7 Steps to Pure Comfort Recipe works beautifully with both.
Why did my bread not rise properly?
Common reasons include water temperature that’s too hot or too cold (it should be around 110°F), expired yeast, or the dough being left in a drafty or cool place during rising. Ensuring these conditions are just right will yield that perfect rise every time.
Can I add ingredients like herbs or seeds?
Definitely! Adding herbs like rosemary or thyme, or sprinkling seeds like sesame or poppy on top before baking, can elevate your bread with extra flavor and texture, making the Easy Homemade White Bread: 7 Steps to Pure Comfort Recipe your own unique creation.
Is it necessary to knead the dough for 10 minutes?
Kneading develops the gluten network, which gives the bread its structure. While you can use a mixer, hand-kneading for about 10 minutes ensures a smooth, elastic dough and a better crumb.
How do I know when the bread is fully baked?
The crust should be a warm golden brown, and the loaf will sound hollow if you tap its bottom. An internal temperature of about 190°F is a sure sign of fully baked bread.
Final Thoughts
There’s something truly special about making bread from scratch, and this Easy Homemade White Bread: 7 Steps to Pure Comfort Recipe is the perfect place to start. With simple ingredients and clear steps, you can bring that cozy bakery feeling right into your kitchen. So grab your mixing bowl and enjoy the warmth of homemade bread fresh from your oven. Trust me, once you try it, you’ll be hooked on this delicious ritual of comfort and joy.
Print
Easy Homemade White Bread: 7 Steps to Pure Comfort Recipe
- Prep Time: 15 minutes
- Cook Time: 35 minutes
- Total Time: 1 hour 50 minutes
- Yield: 1 loaf (about 12 slices)
- Category: Bread
- Method: Baking
- Cuisine: American
Description
This Easy Homemade White Bread recipe guides you through making soft, fluffy, and comforting white bread from scratch using simple ingredients and straightforward steps. Perfect for beginners, it yields a classic loaf with a tender crumb and a golden crust ideal for sandwiches or toast.
Ingredients
Dry Ingredients
- 4 cups all-purpose flour
- 2 tablespoons sugar
- 1 tablespoon salt
- 1 packet (2 1/4 teaspoons) active dry yeast
Wet Ingredients
- 1 1/2 cups warm water (110°F)
- 2 tablespoons unsalted butter, softened
Instructions
- Activate the Yeast: In a bowl, dissolve the yeast and sugar in warm water (110°F), then let it sit for 5 minutes until frothy, indicating the yeast is active.
- Mix Ingredients: Add the flour, salt, and softened butter to the yeast mixture and combine until a dough forms.
- Knead the Dough: Turn the dough onto a floured surface and knead for about 10 minutes until it becomes smooth and elastic.
- First Rise: Place the dough in a greased bowl, cover it with a towel or plastic wrap, and let it rise in a warm place for about 1 hour, until it doubles in size.
- Shape the Loaf: Punch down the risen dough to release air, shape it into a loaf, and place it into a greased loaf pan.
- Second Rise: Cover the loaf pan and let the dough rise again until doubled in size, about 30 minutes.
- Bake the Bread: Preheat your oven to 350°F (175°C), then bake the loaf for 30-35 minutes, or until the crust is golden and the bread sounds hollow when tapped.
- Cool and Serve: Remove the bread from the oven and allow it to cool completely on a wire rack before slicing to maintain texture and shape.
Notes
- Ensure the water is warm, not hot, to avoid killing the yeast.
- Kneading is crucial for developing gluten which gives the bread its structure.
- Let the bread cool fully before slicing to prevent a gummy texture.
- You can brush the top with melted butter after baking for a softer crust.
- Store the bread in an airtight container or breadbox to keep it fresh longer.


